
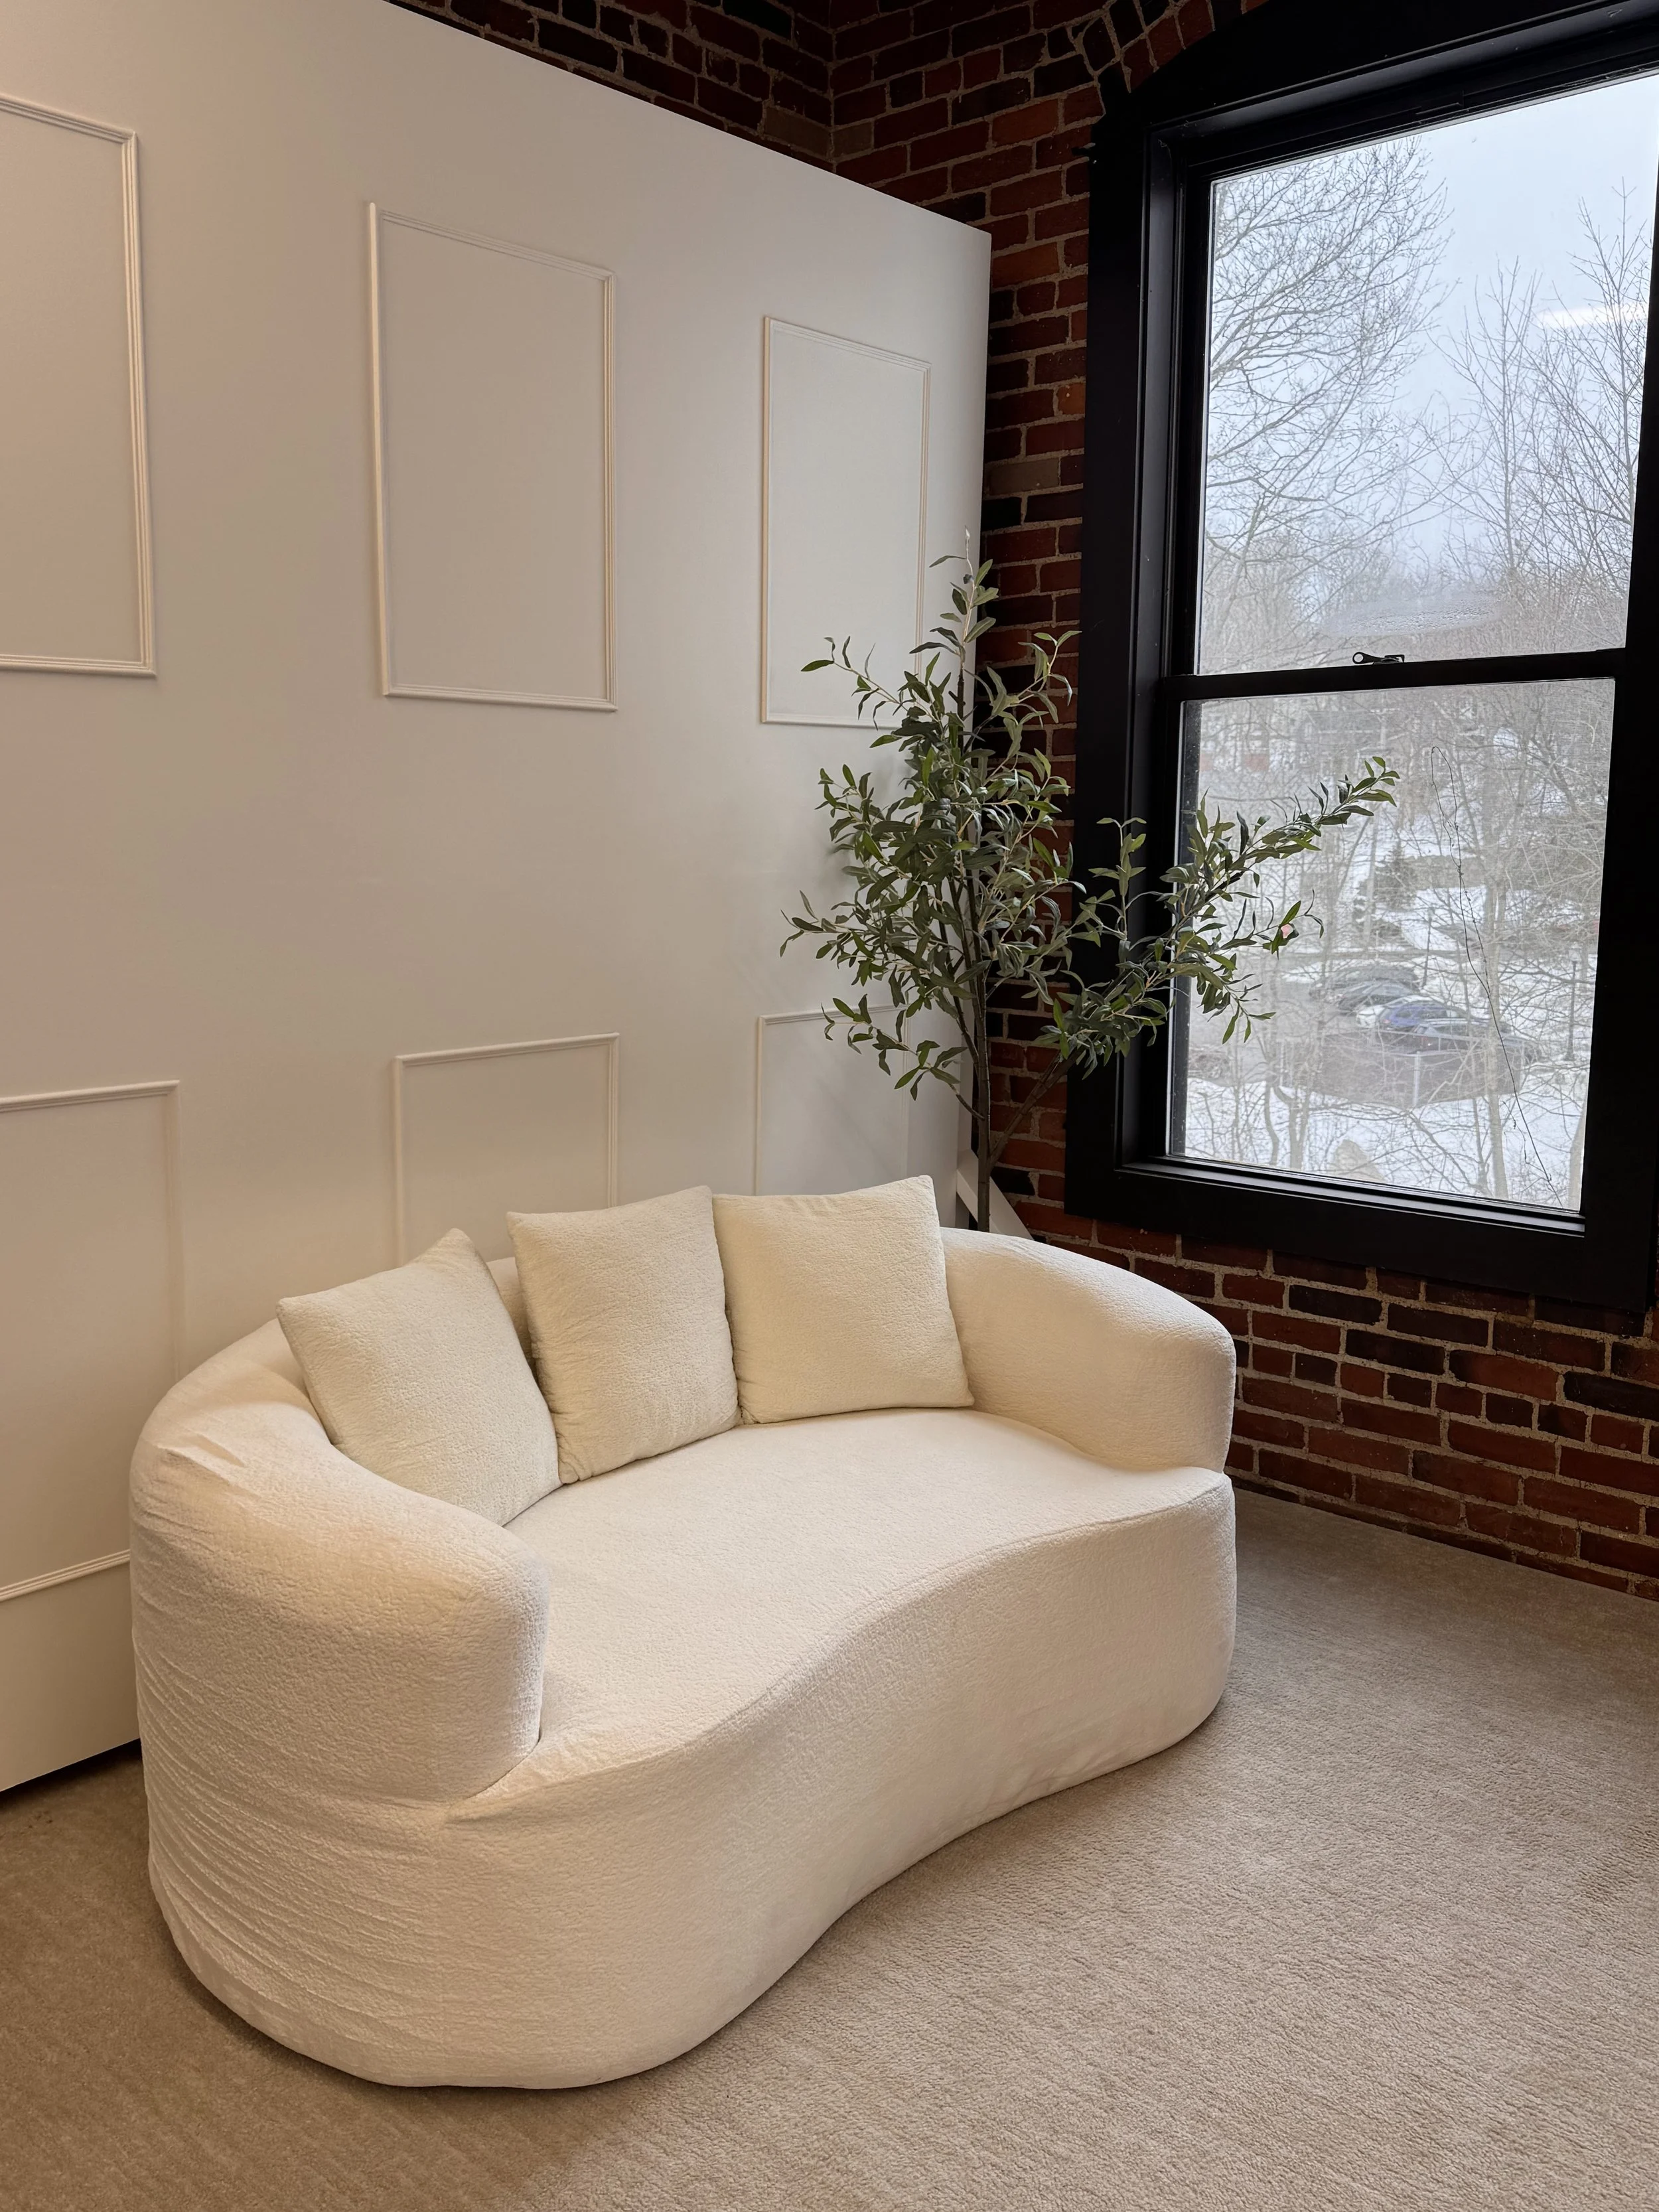
DIY Photography Backdrop Wall
(8×8, Reversible & Mobile)
I built this wall on wheels as a reversible backdrop for a local photographer.
It’s designed to be functional, moveable, and easy to install in sections. Here’s how it came together.
Good luck! Feel free to reach out to me on instagram @centralstreetstudio
Materials
Shop List
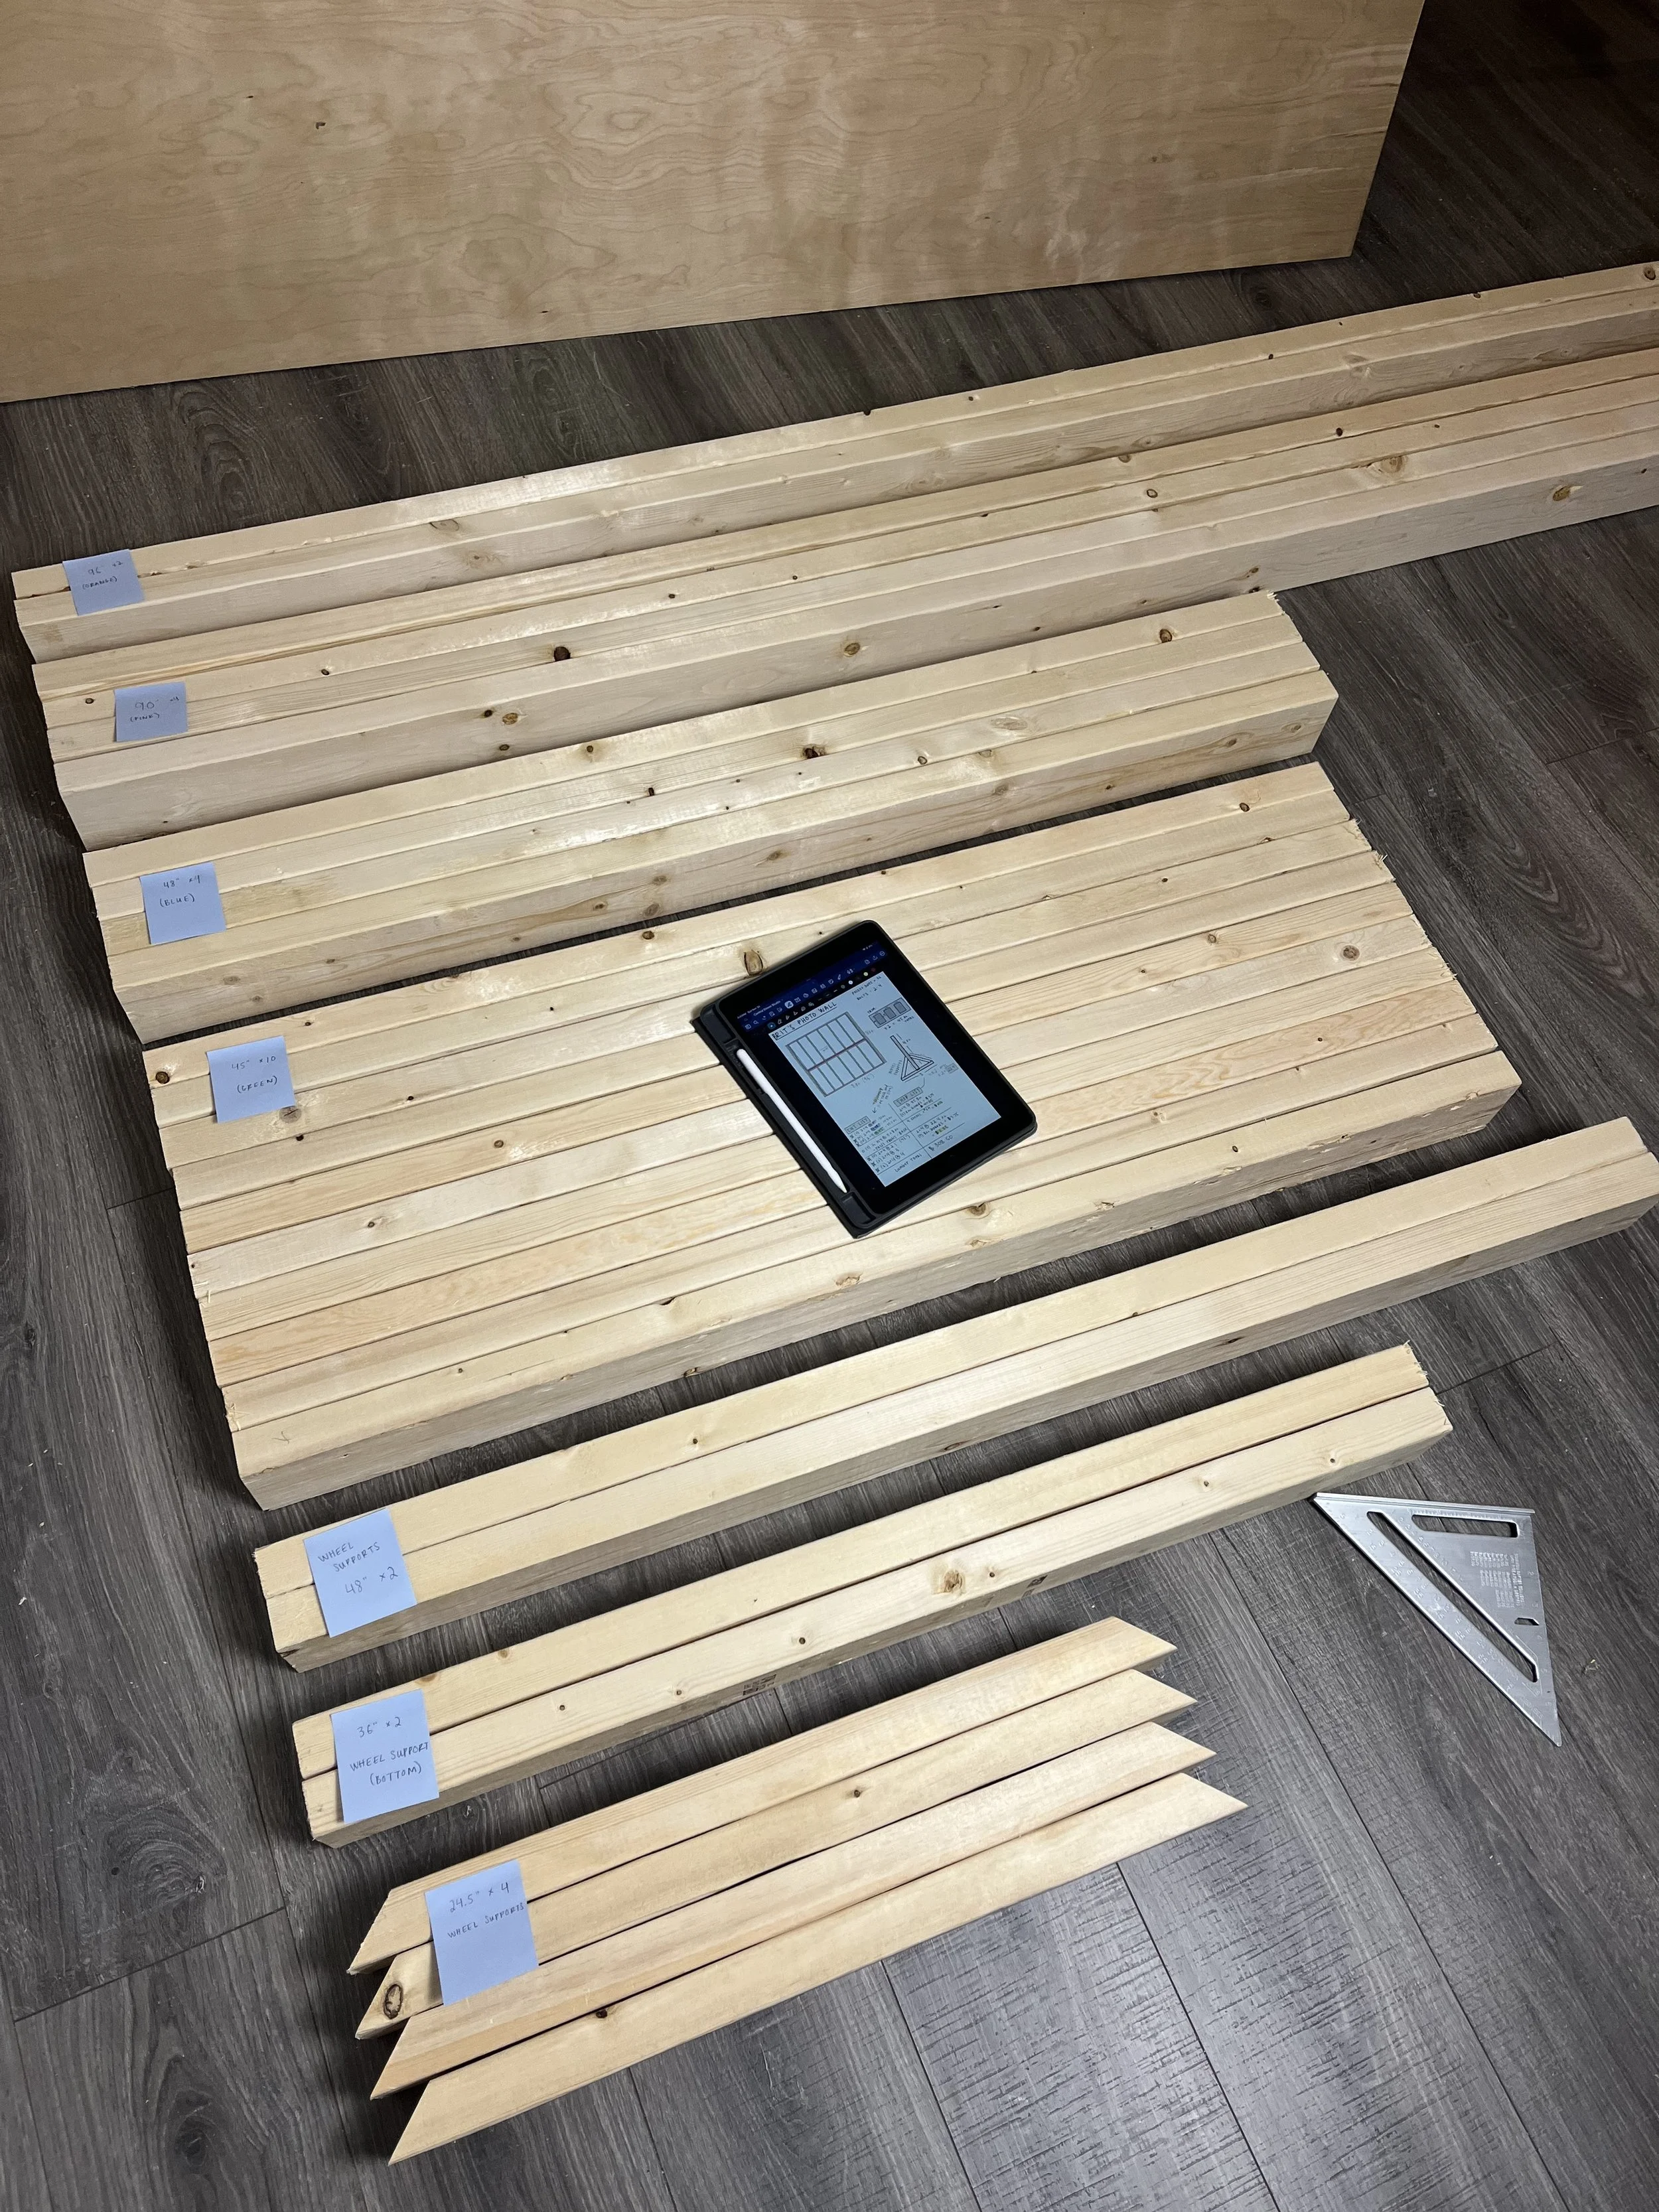
16 × 2x4 @ 8 ft
4 × ¼” Birch plywood @ 4x8 ft (or 2 @ 8x8 ft)
2 × 8” bolts (~½” thick or more)
8 × 6” bolts (~½” thick or more)
2 × 5” heavy-duty caster wheels with locks
Cut List
4 × 2x4 @ 90” (horizontal supports)
4 × 2x4 @ 48” (vertical supports)
10 × 2x4 @ 45” (vertical supports)
2 × 2x4 @ 96” (vertical supports)
4 × ¼” plywood @ 4x8 (front/back faces)
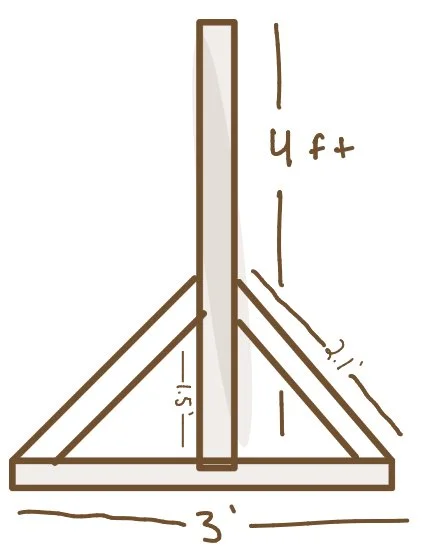
4 × 2x4 @ 2.1 ft, 45° on both ends (wheel supports – diagonal)
2 × 2x4 @ 3 ft (wheel supports – horizontal)
2 × 2x4 @ 4 ft (wheel supports – vertical)
Build Steps
1. Cut all wood to size
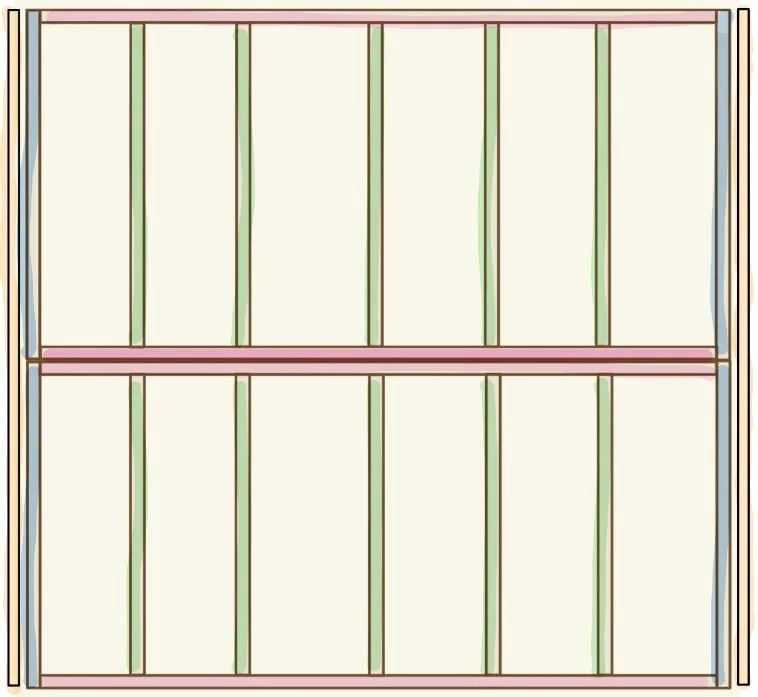
2. Lay out both wall frames
Lay out two identical 4×8 sections on the floor with consistent spacing, like framing a wall.
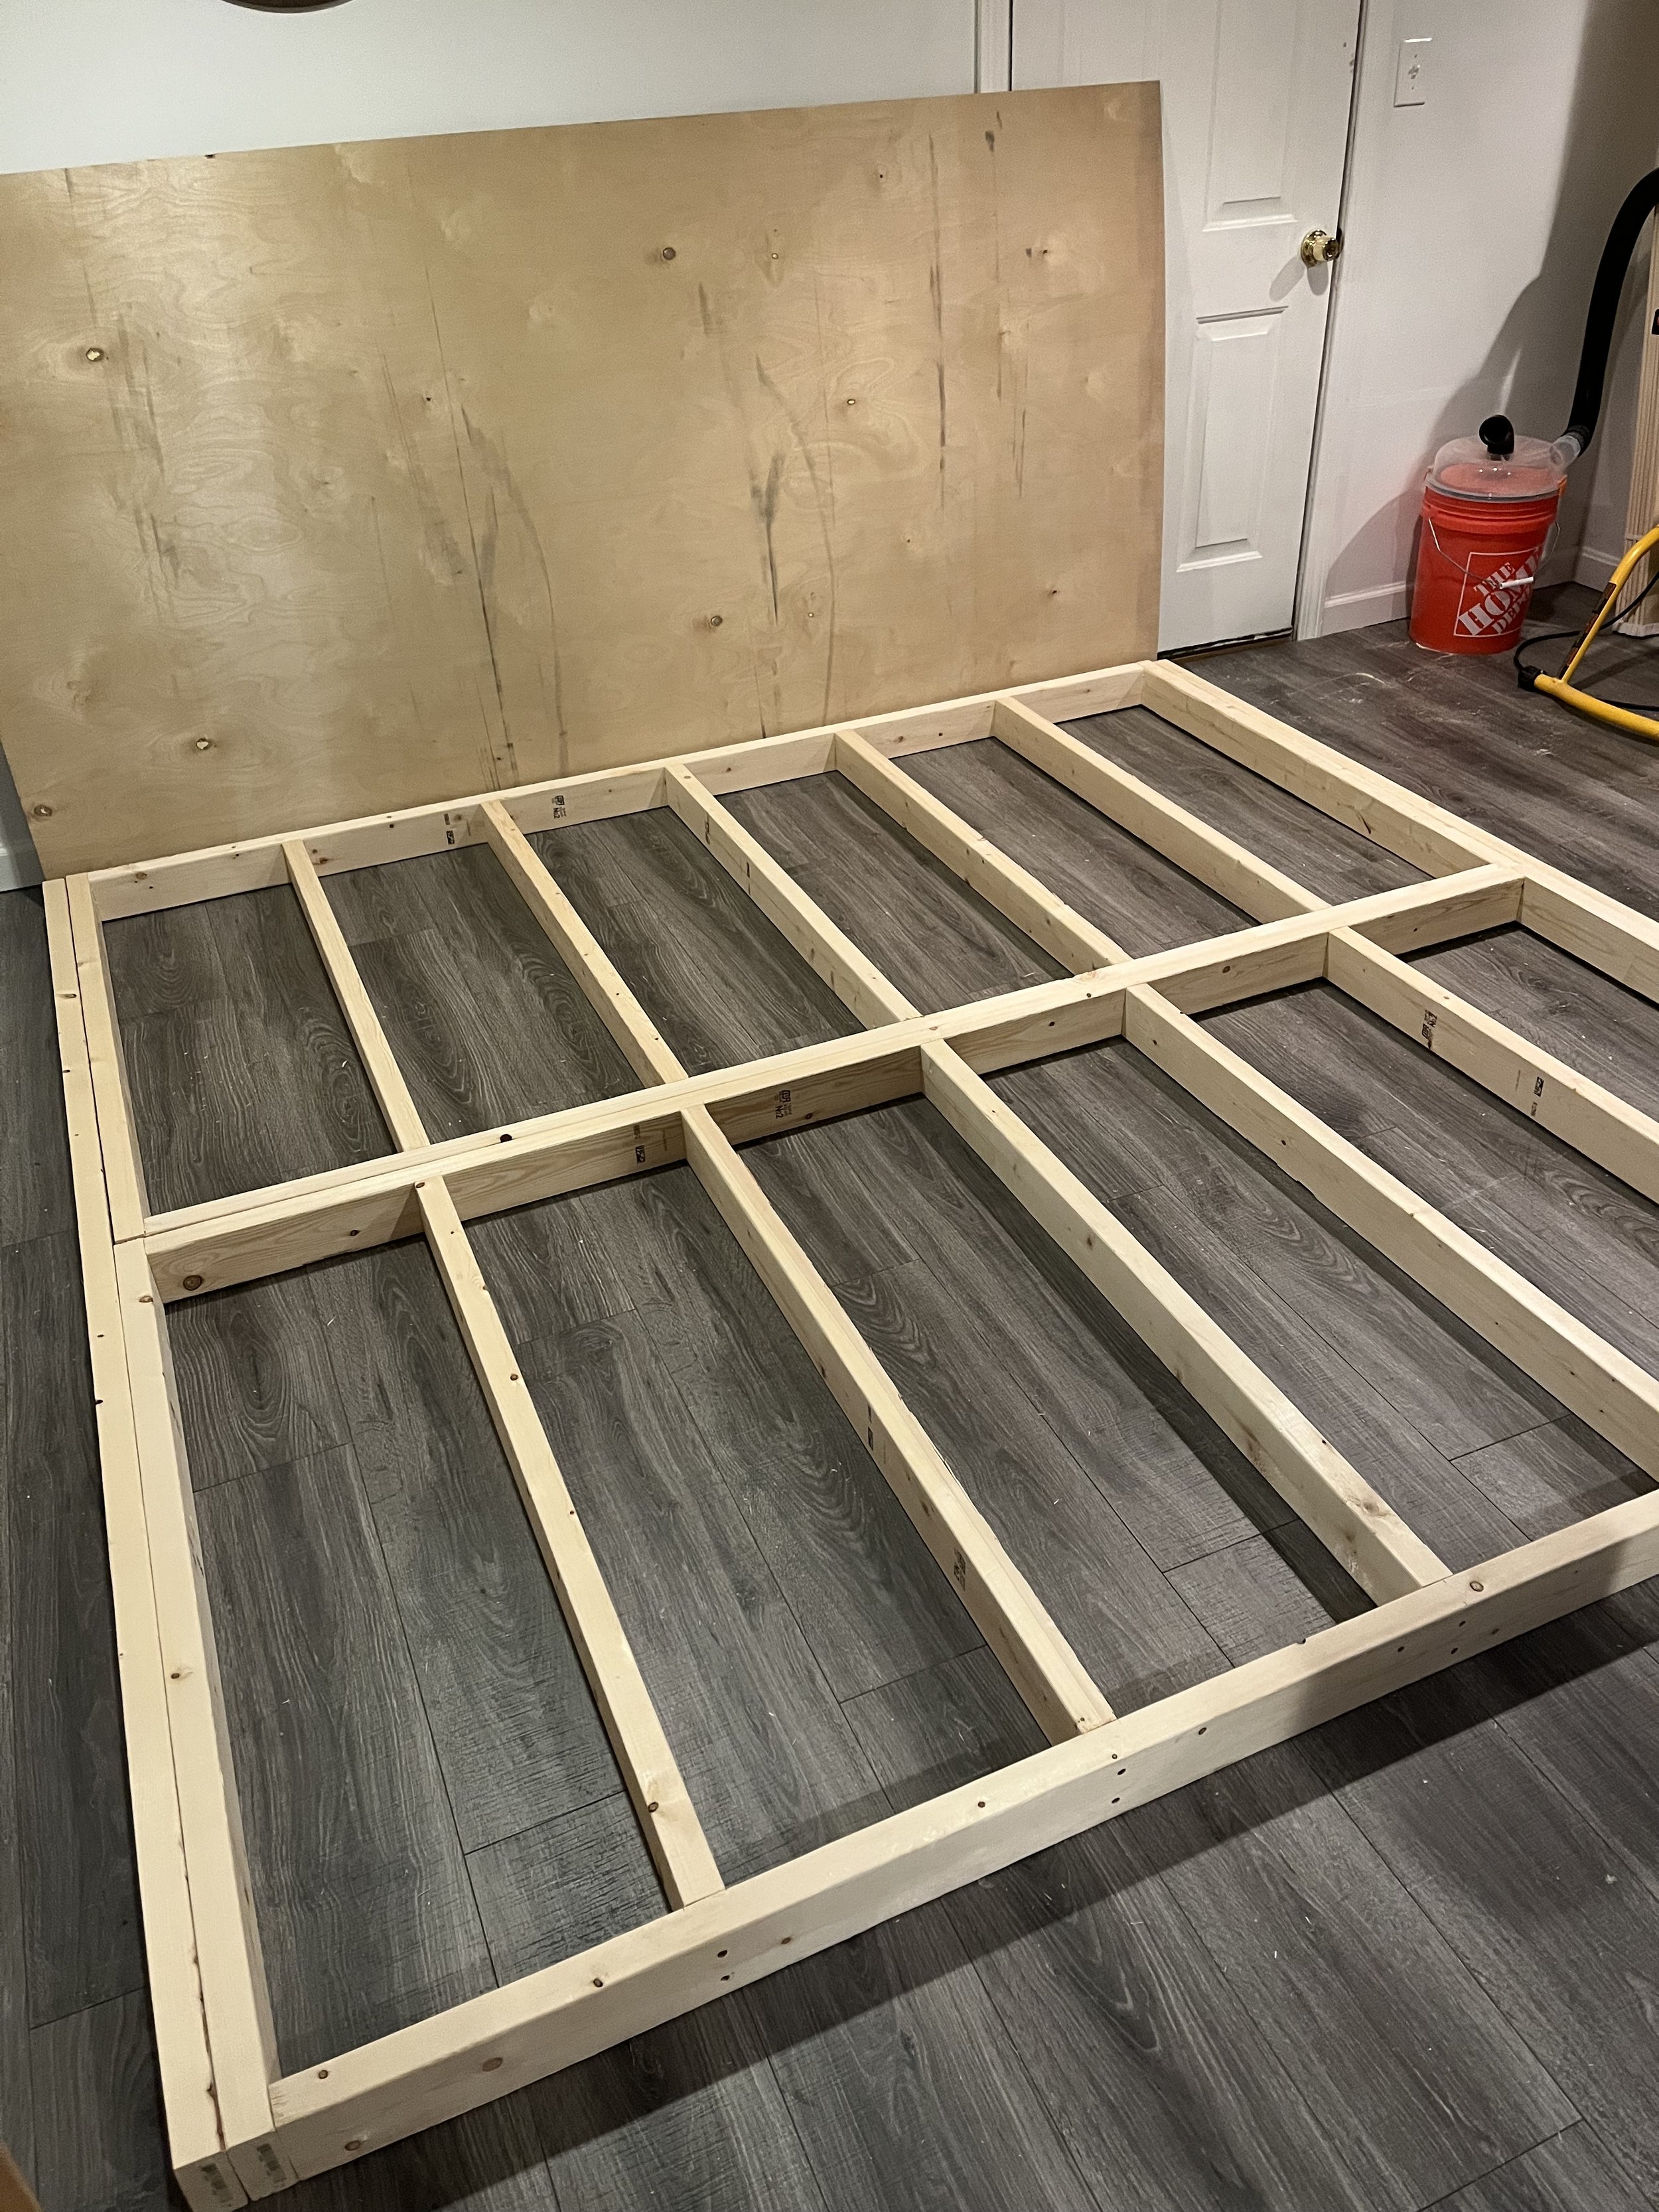
3. Assemble the frames
Attach all pieces using glue and 2” long wood screws.
You should now have two completed wall sections.
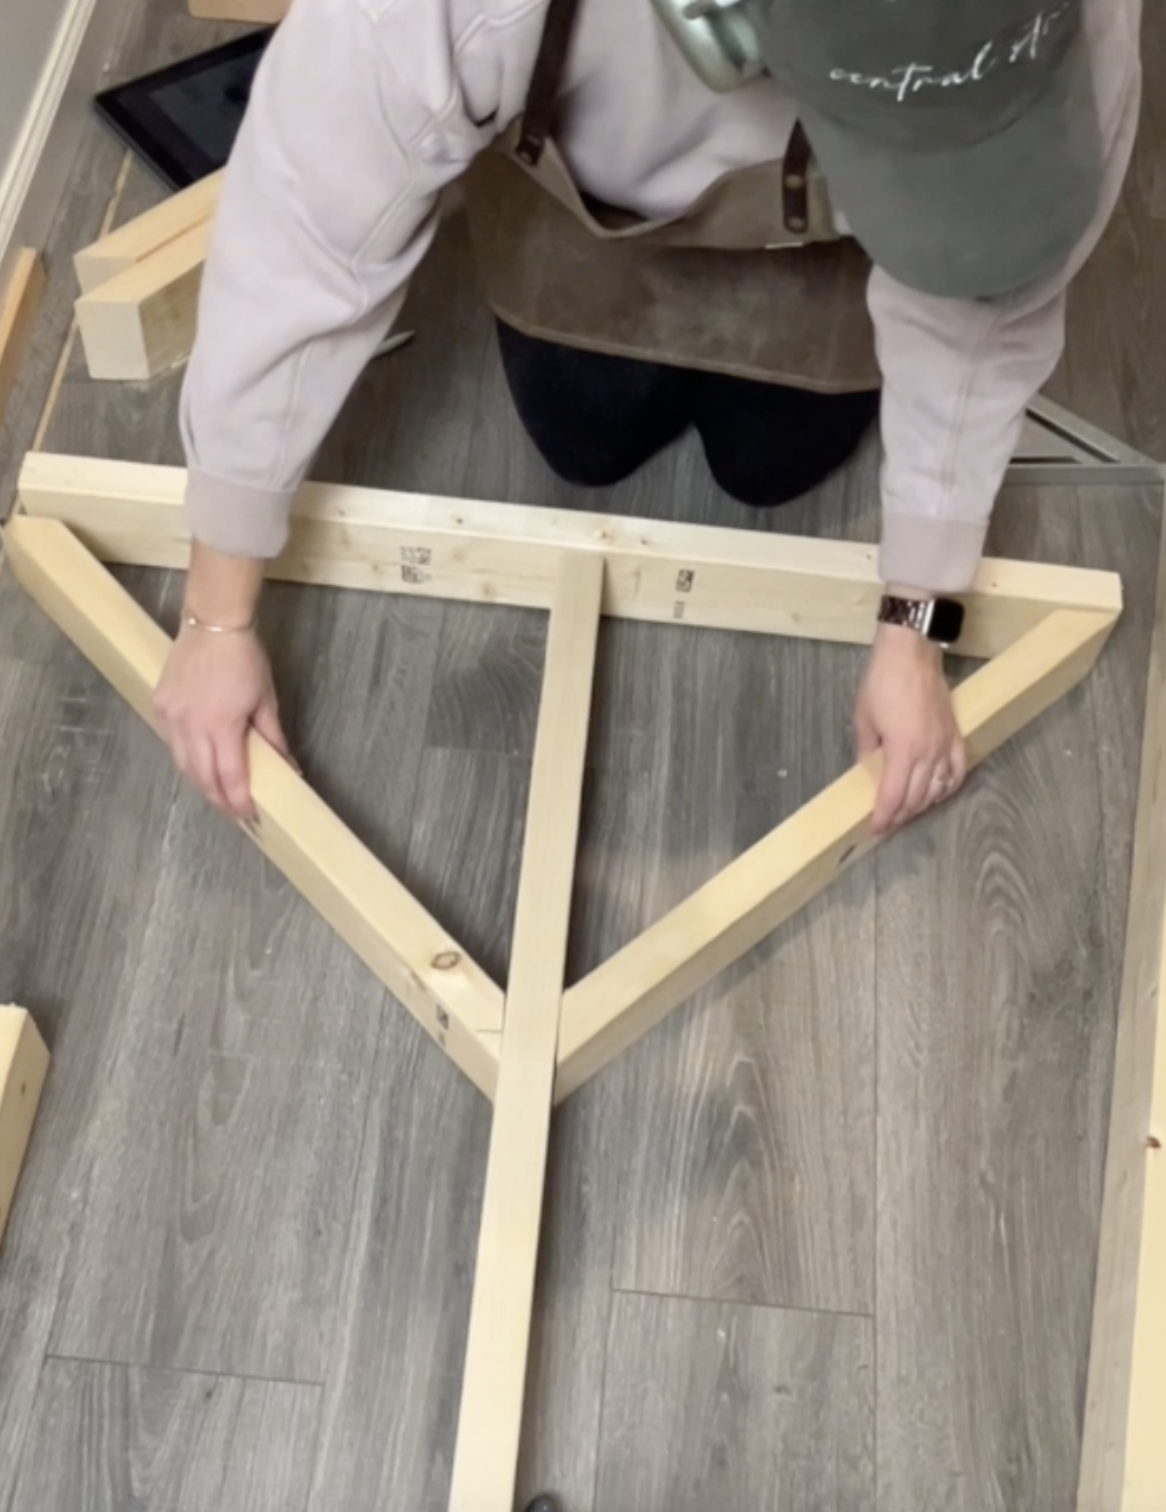
4. Build wheel supports
Glue and screw the wheel supports together, then attach the caster wheels.
5. Pre-drill for 8” bolts
Pre-drill holes for the 8” bolts. These will go through:
Wheel support
Full 8 ft vertical outer support
Bottom frame
6. Mark and drill matching holes
Drill corresponding holes in the vertical support and bottom frame.
Ensure the final wall will sit less than 1” off the ground with wheels installed.
Do not attach the wheel supports yet.
7. Pre-drill for stacking bolts
Clamp the top and bottom sections together.
Pre-drill holes for the 6” bolts that will secure the sections when stacked.
Do not bolt together yet.
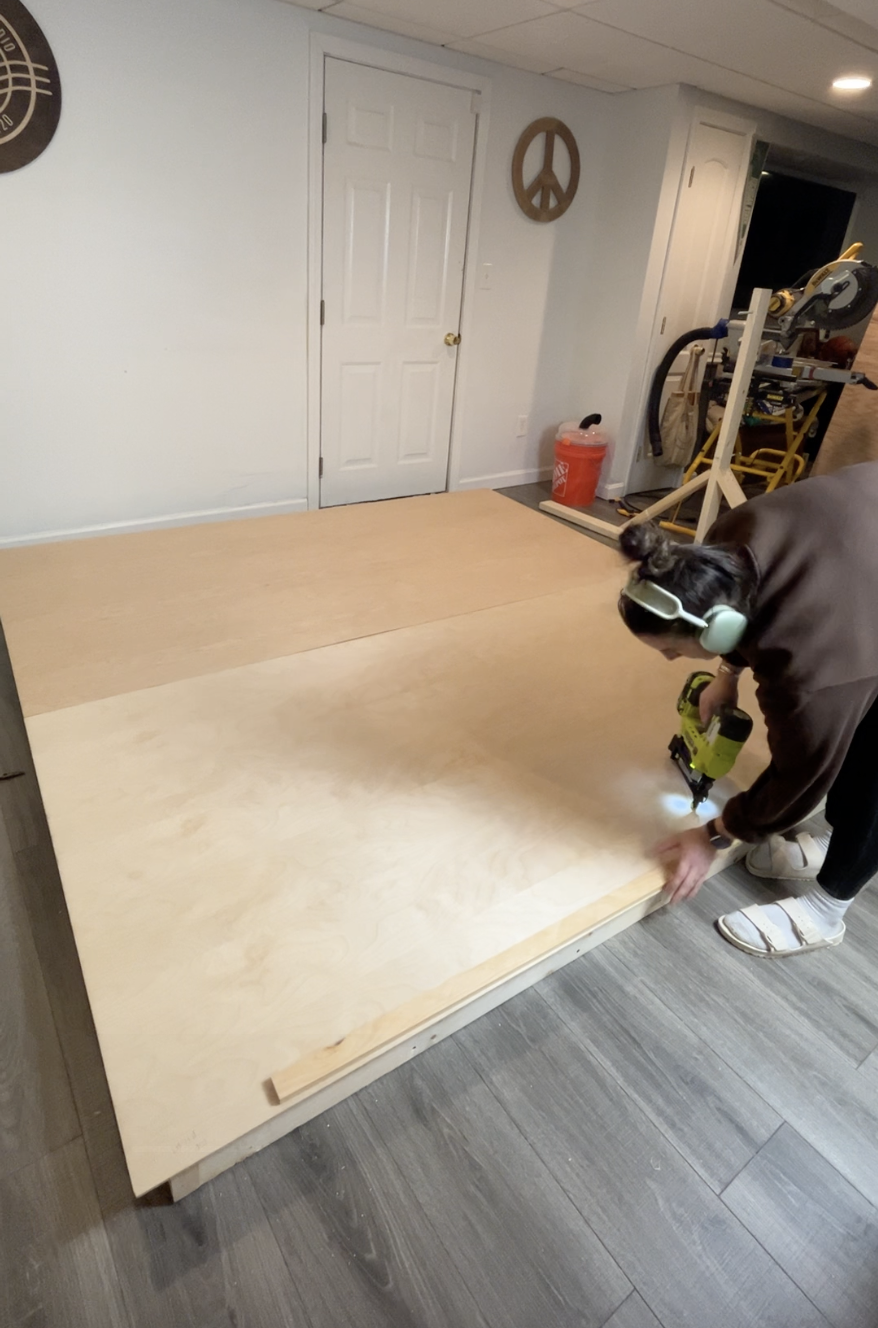
8. Attach first plywood face
Secure plywood to one side using glue and brad nails.
Align the plywood seam with the seam where the two sections will meet.
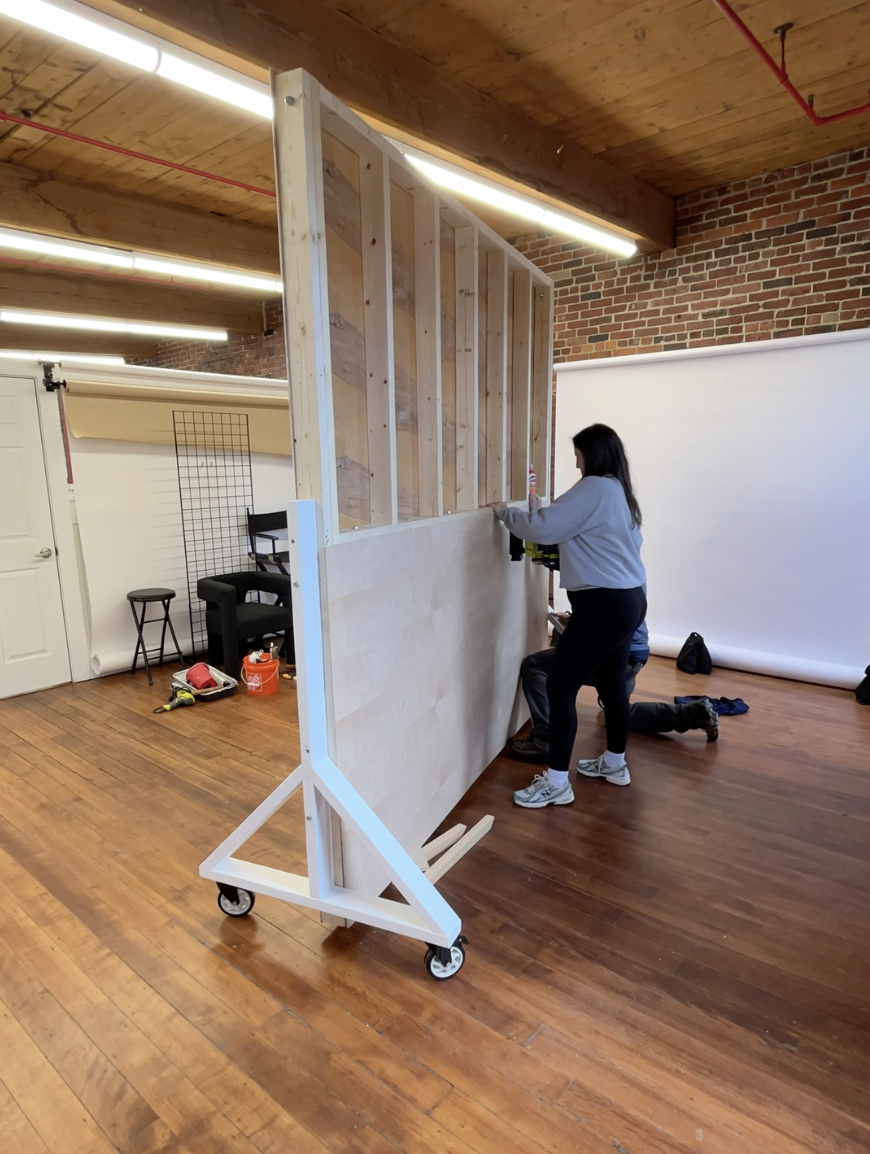
9. Attach wheel supports
Stand up the bottom section.
Line up the full 8 ft vertical supports on both sides.
Insert 8” bolts through all layers and secure with nuts.
10. Stack and secure
Place the top section onto the bottom section.
Secure using the pre-drilled 6” bolts and nuts.
11. Secure top corners
Drill one hole in the top left and right corners.
Attach the 8 ft vertical supports to the top frame with bolts and nuts.
12. Attach second plywood face
Secure plywood on the reverse side using glue and brad nails.
13. Finish
Fill seams
Sand (rough → fine)
Paint
Use flat or matte, non-glare paint with scuff resistance.
Result
8×8 ft wall
Reversible
Fully mobile
Built in two sections for transport and install